
How to Use the Windows 11 Readiness Tool
Below you will find a video walk-through and step-by-step instructions that take you through how to use the Device Readiness Tool. If you still need support after viewing these, please reach out to us here.
-
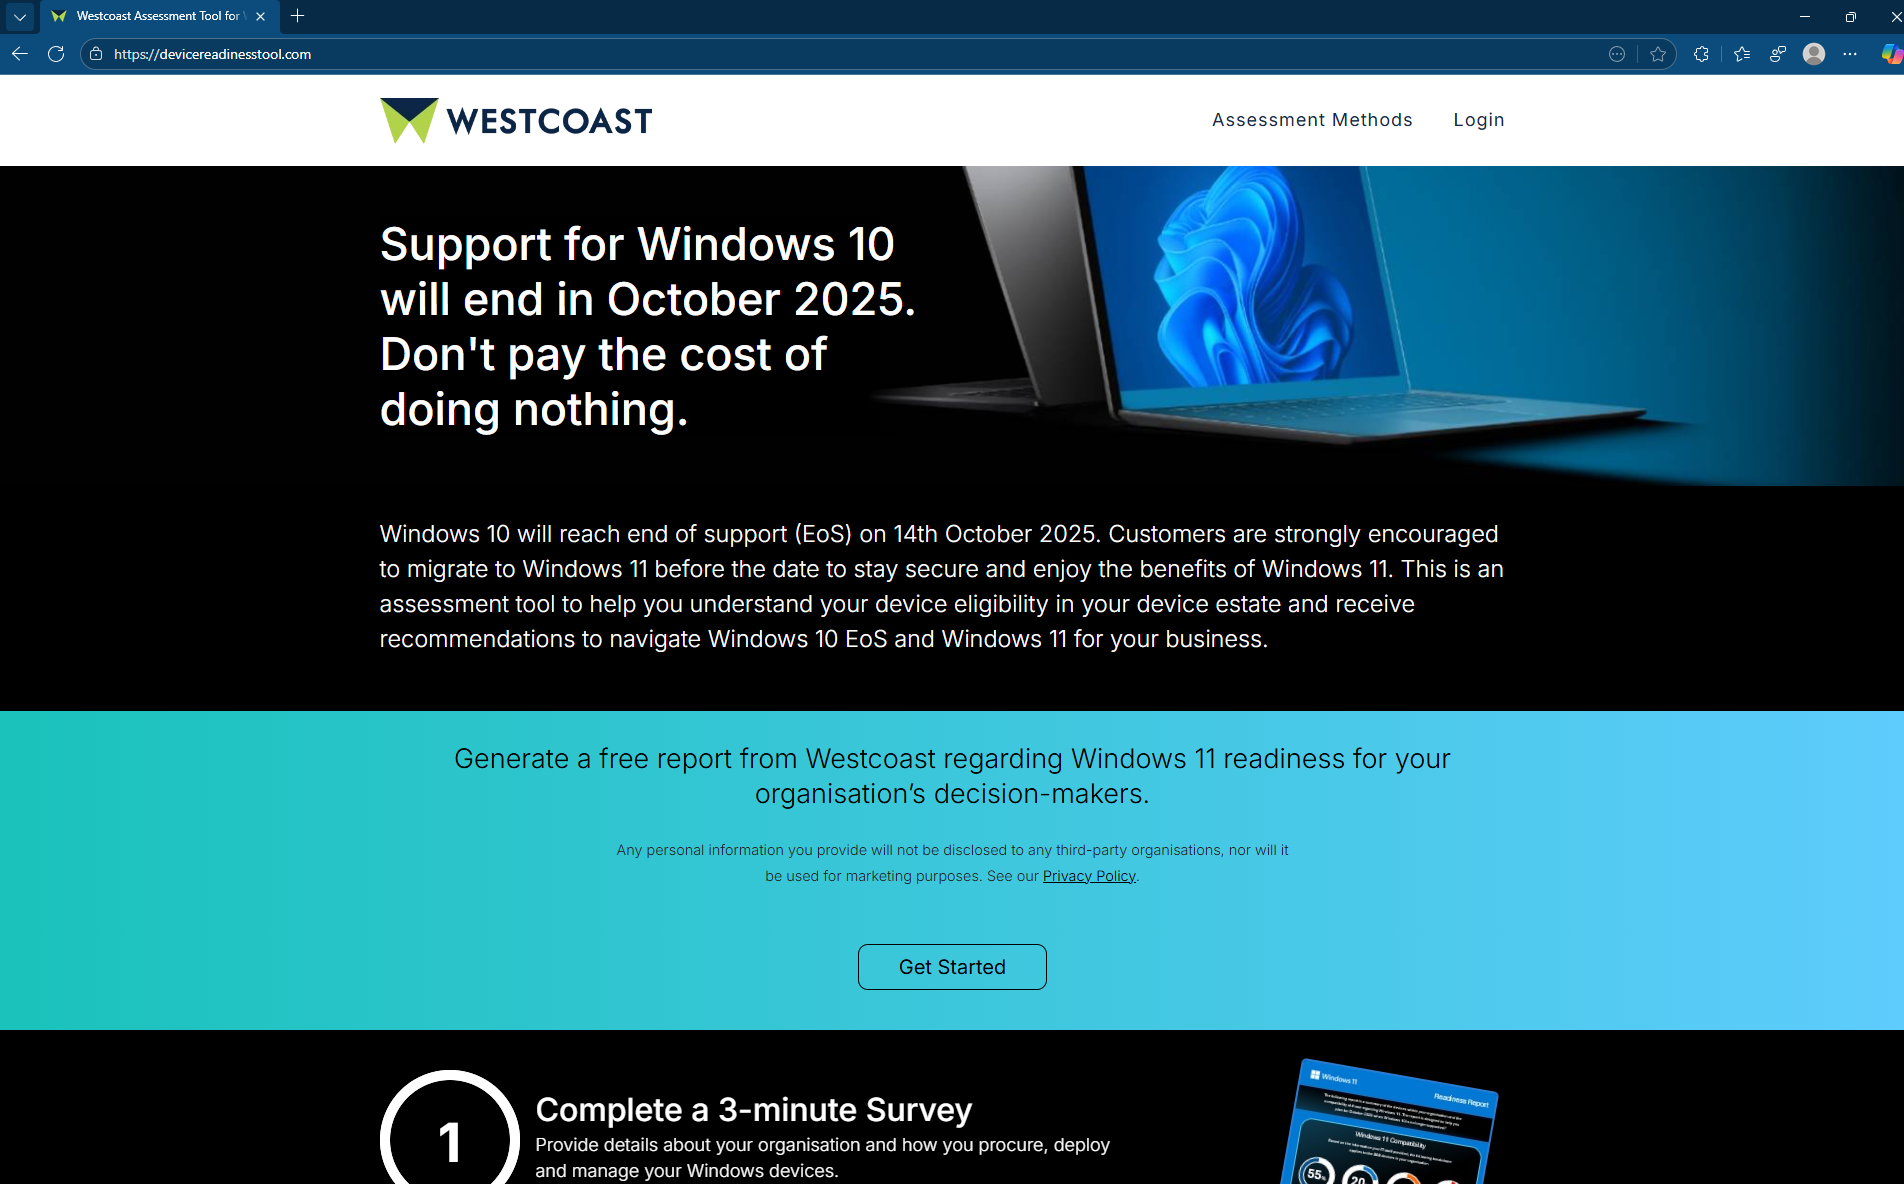
Open a web browser and navigate to Windows 11 Readiness Tool, then choose Login from the menu.
 Click to enlarge
 -
At the Login page, choose Continue with Microsoft.
Alternatively, you can register with an email address and password.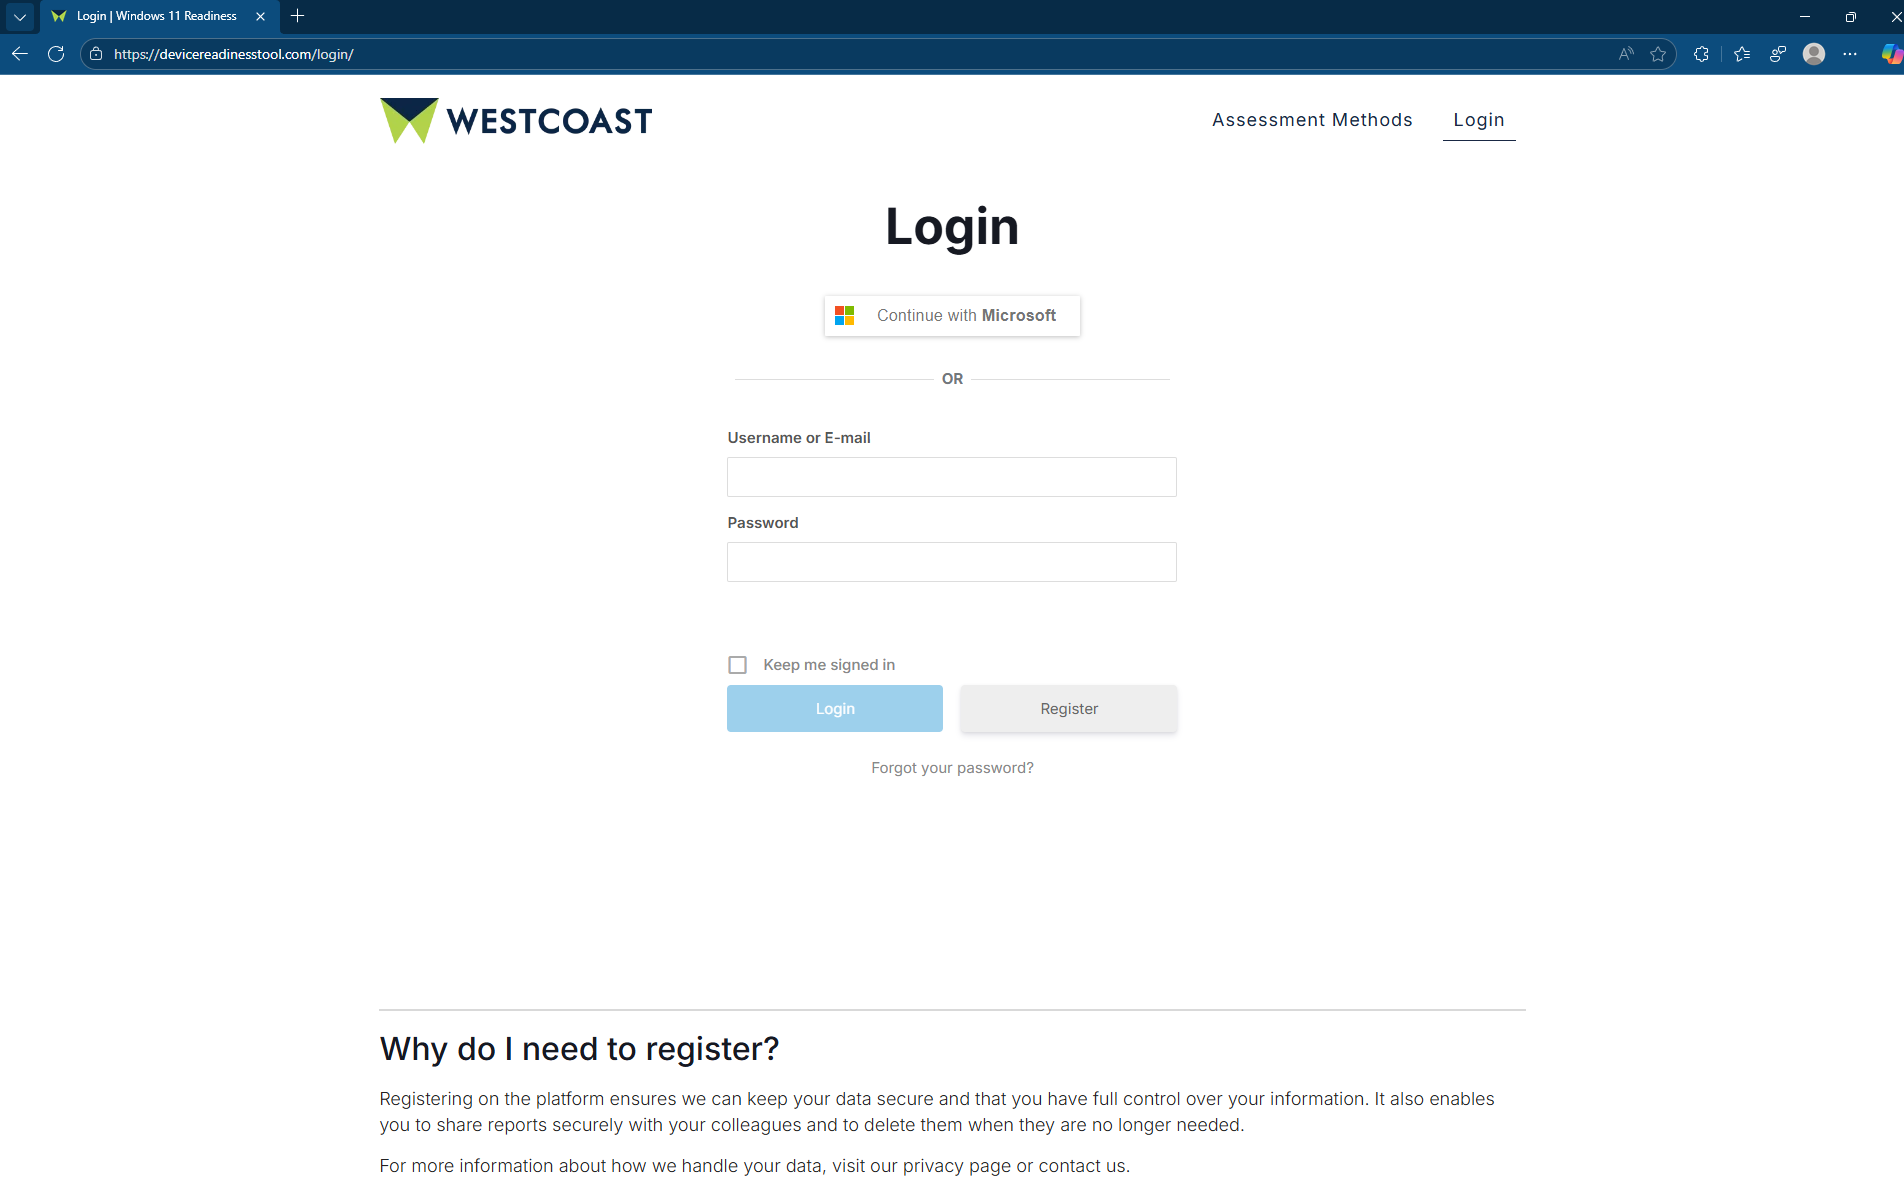 Click to enlarge
 -
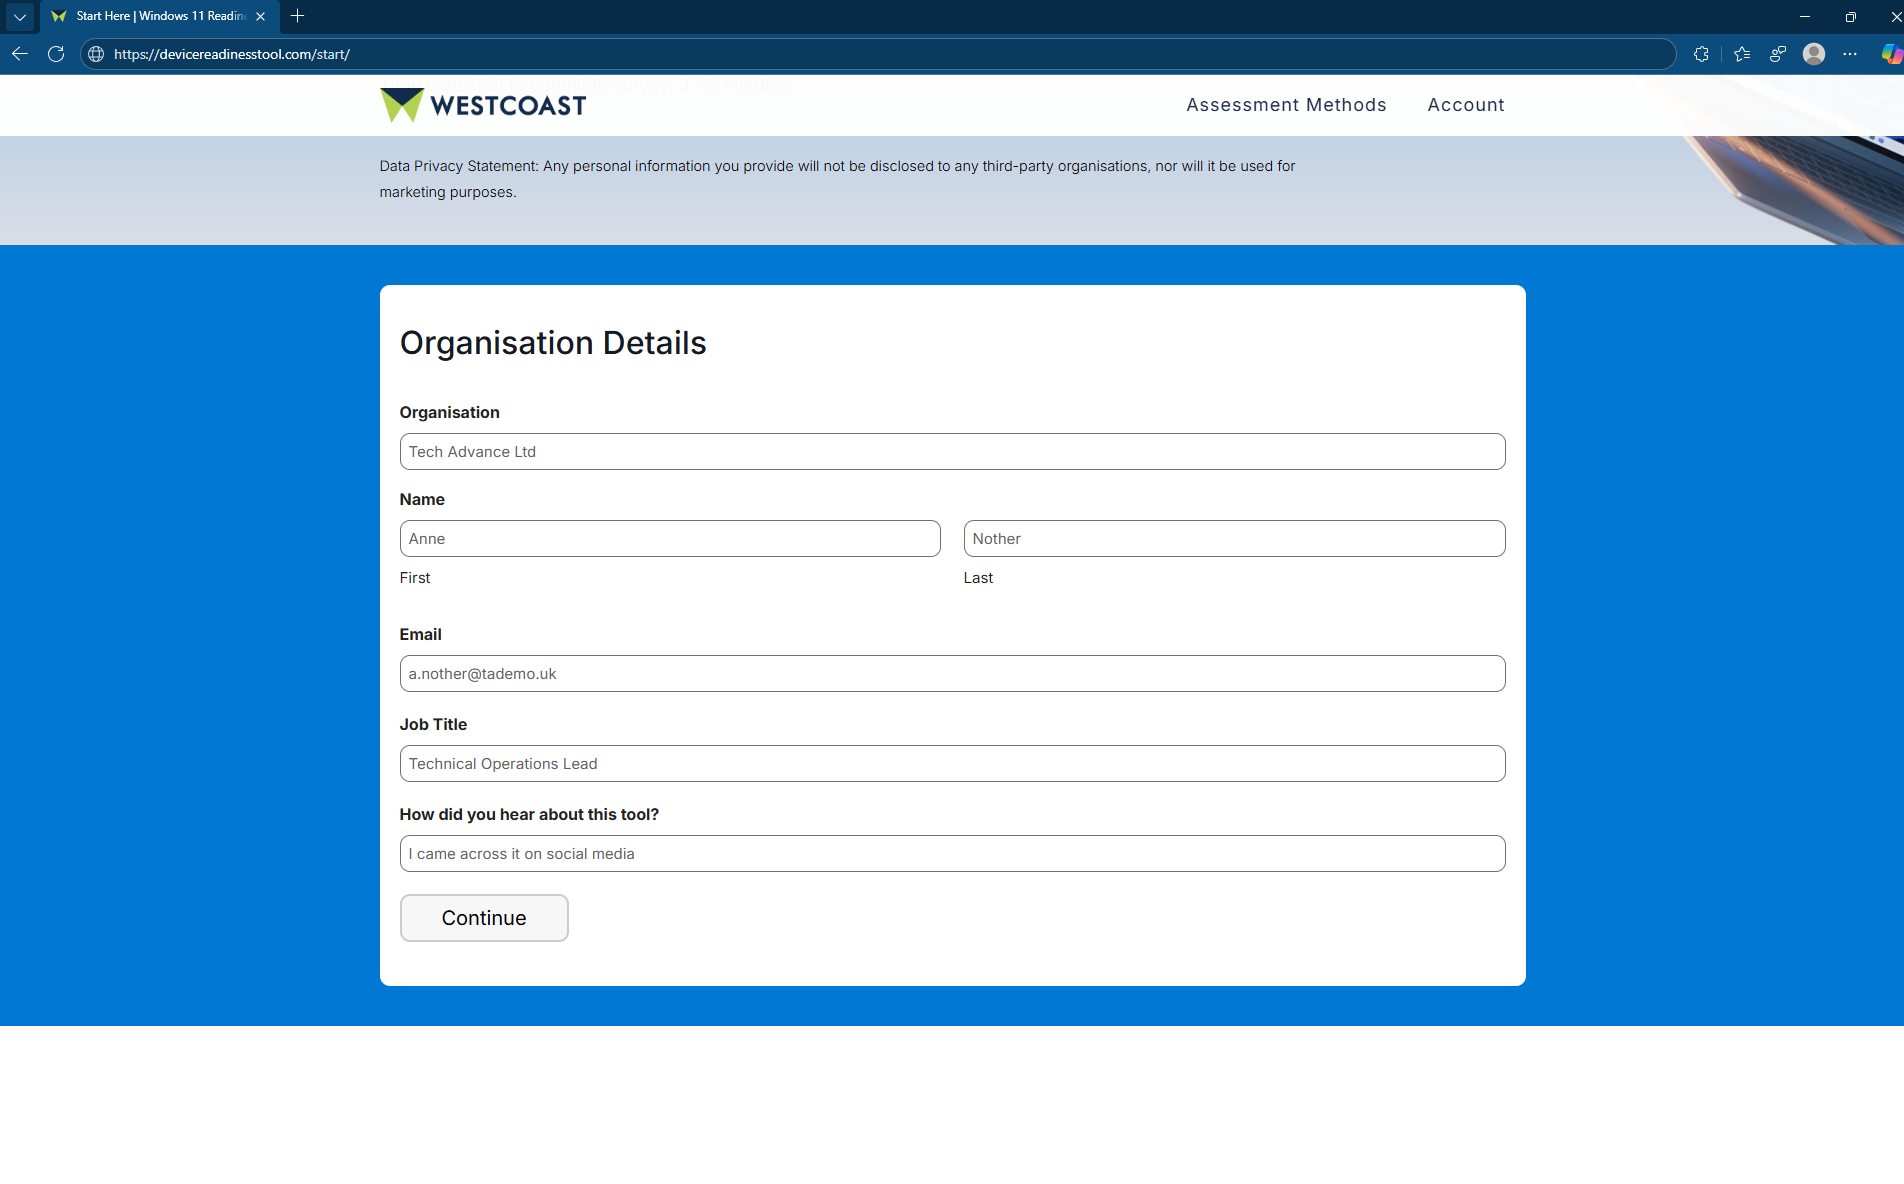
At the Begin your Readiness Assessment page, complete the Organisation Details form and click Continue.
 Click to enlarge
 -
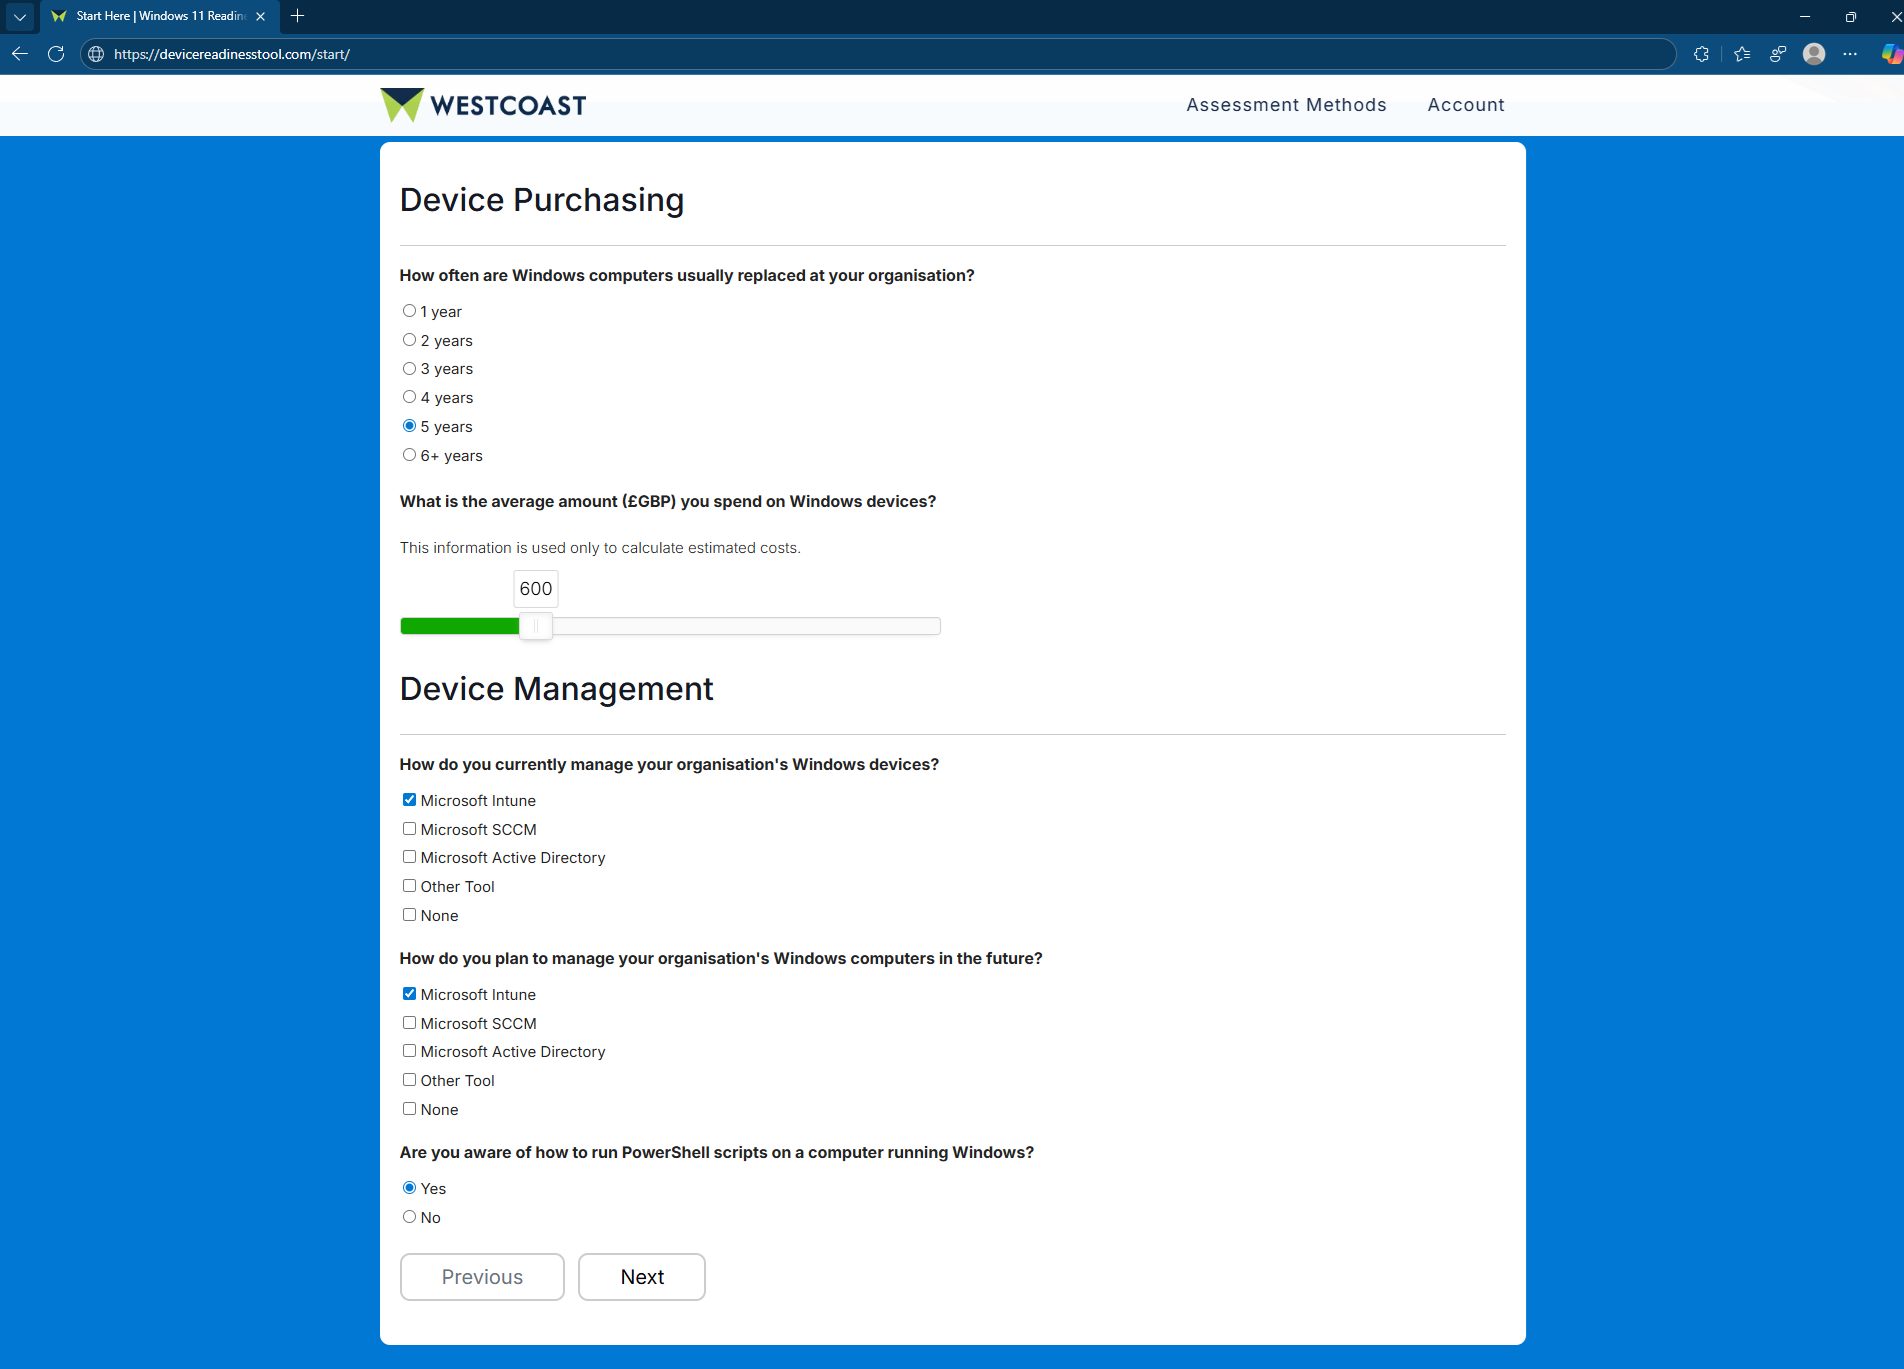
Continue by completing the Device Purchasing and Device Management forms, then choose Next.
 Click to enlarge
 -
Follow the deep-links on the Readiness Assessment page to select your preferred method of collecting device readiness data. Then choose Upload Logs.
Example: Selecting Intune as the collection method will show instructions relevant to Intune.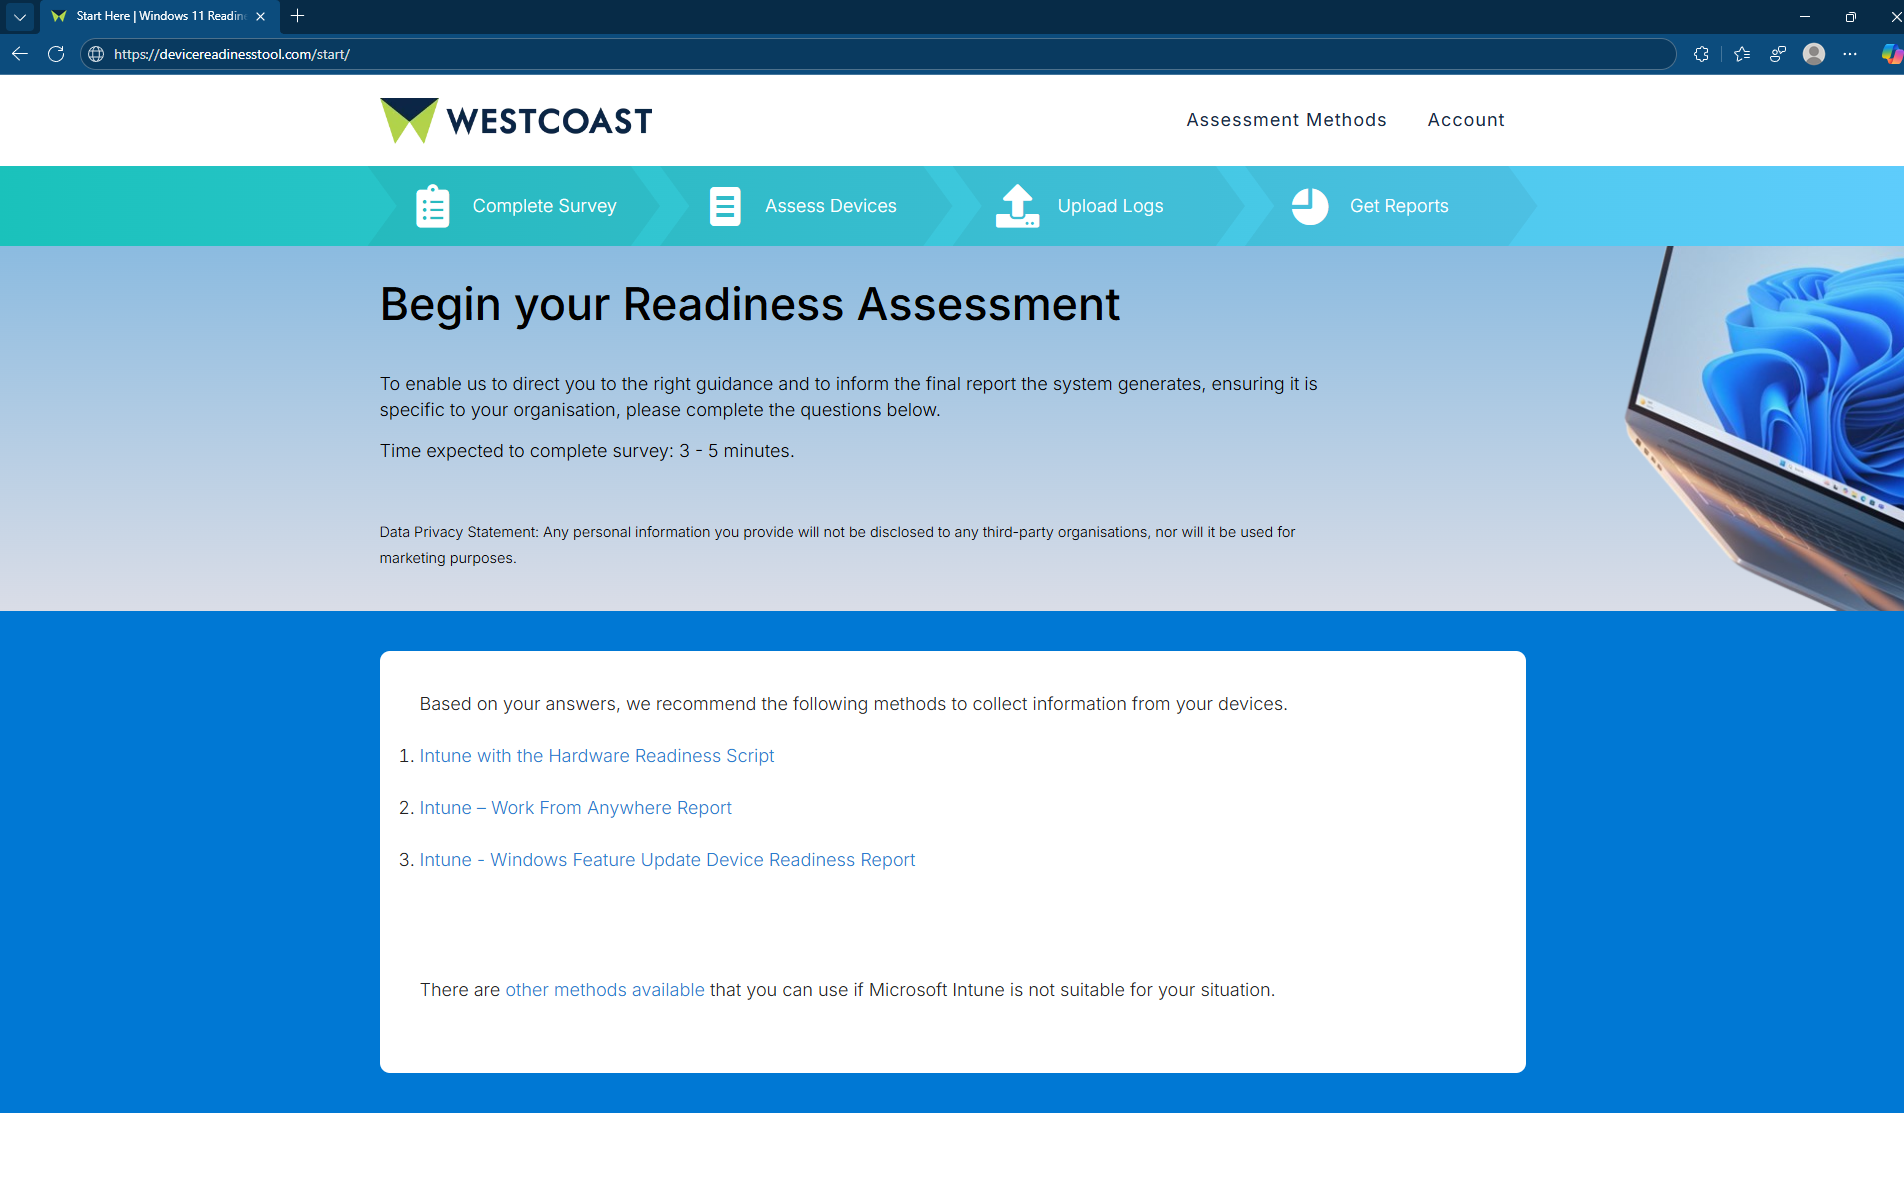 Click to enlarge
 -
At the Upload Logs page, click Choose File, select your CSV file with readiness data, and choose Submit.
If uploading fails, click Can't Upload? Check here to paste CSV data manually.
Required CSV columns:DeviceName,OSVersion,PreRemediationDetectionScriptOutput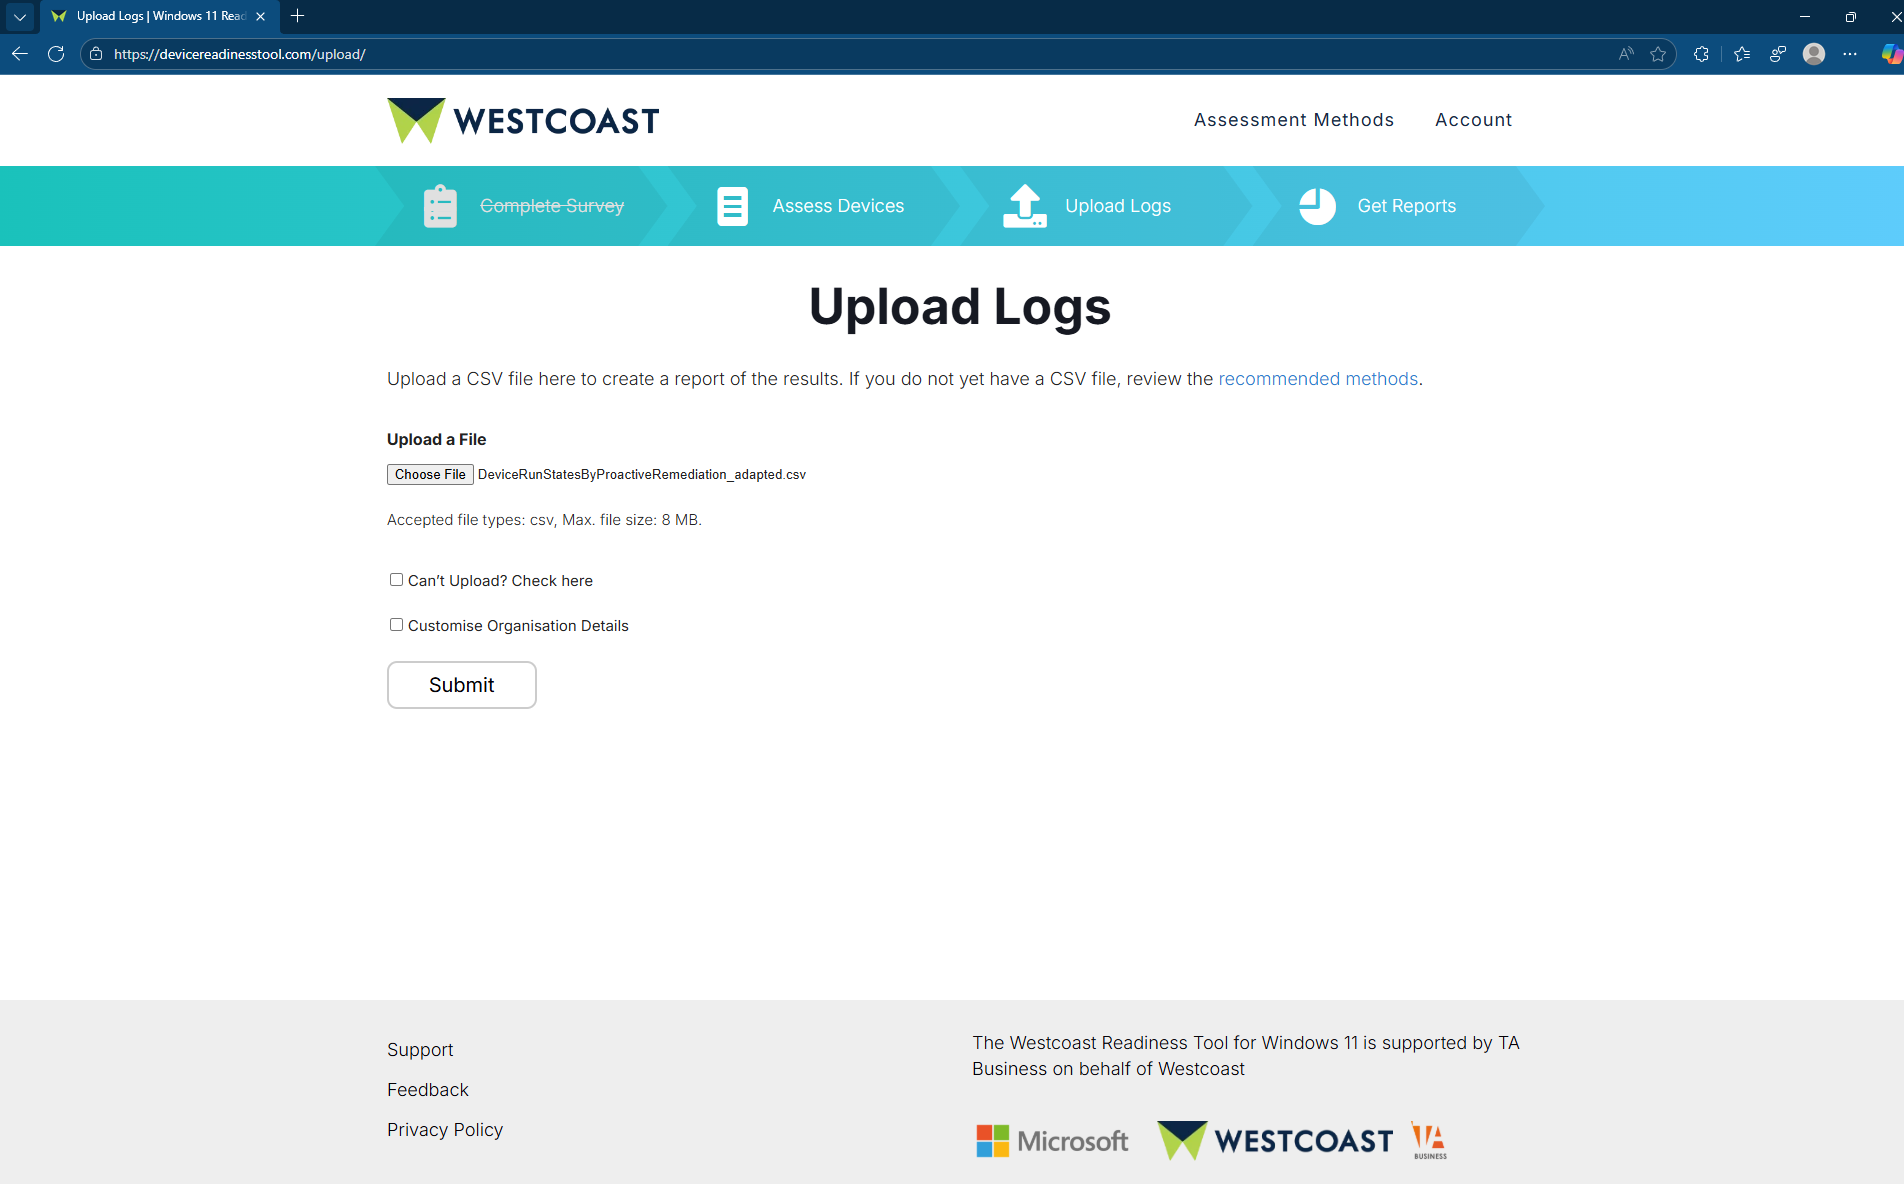 Click to enlarge
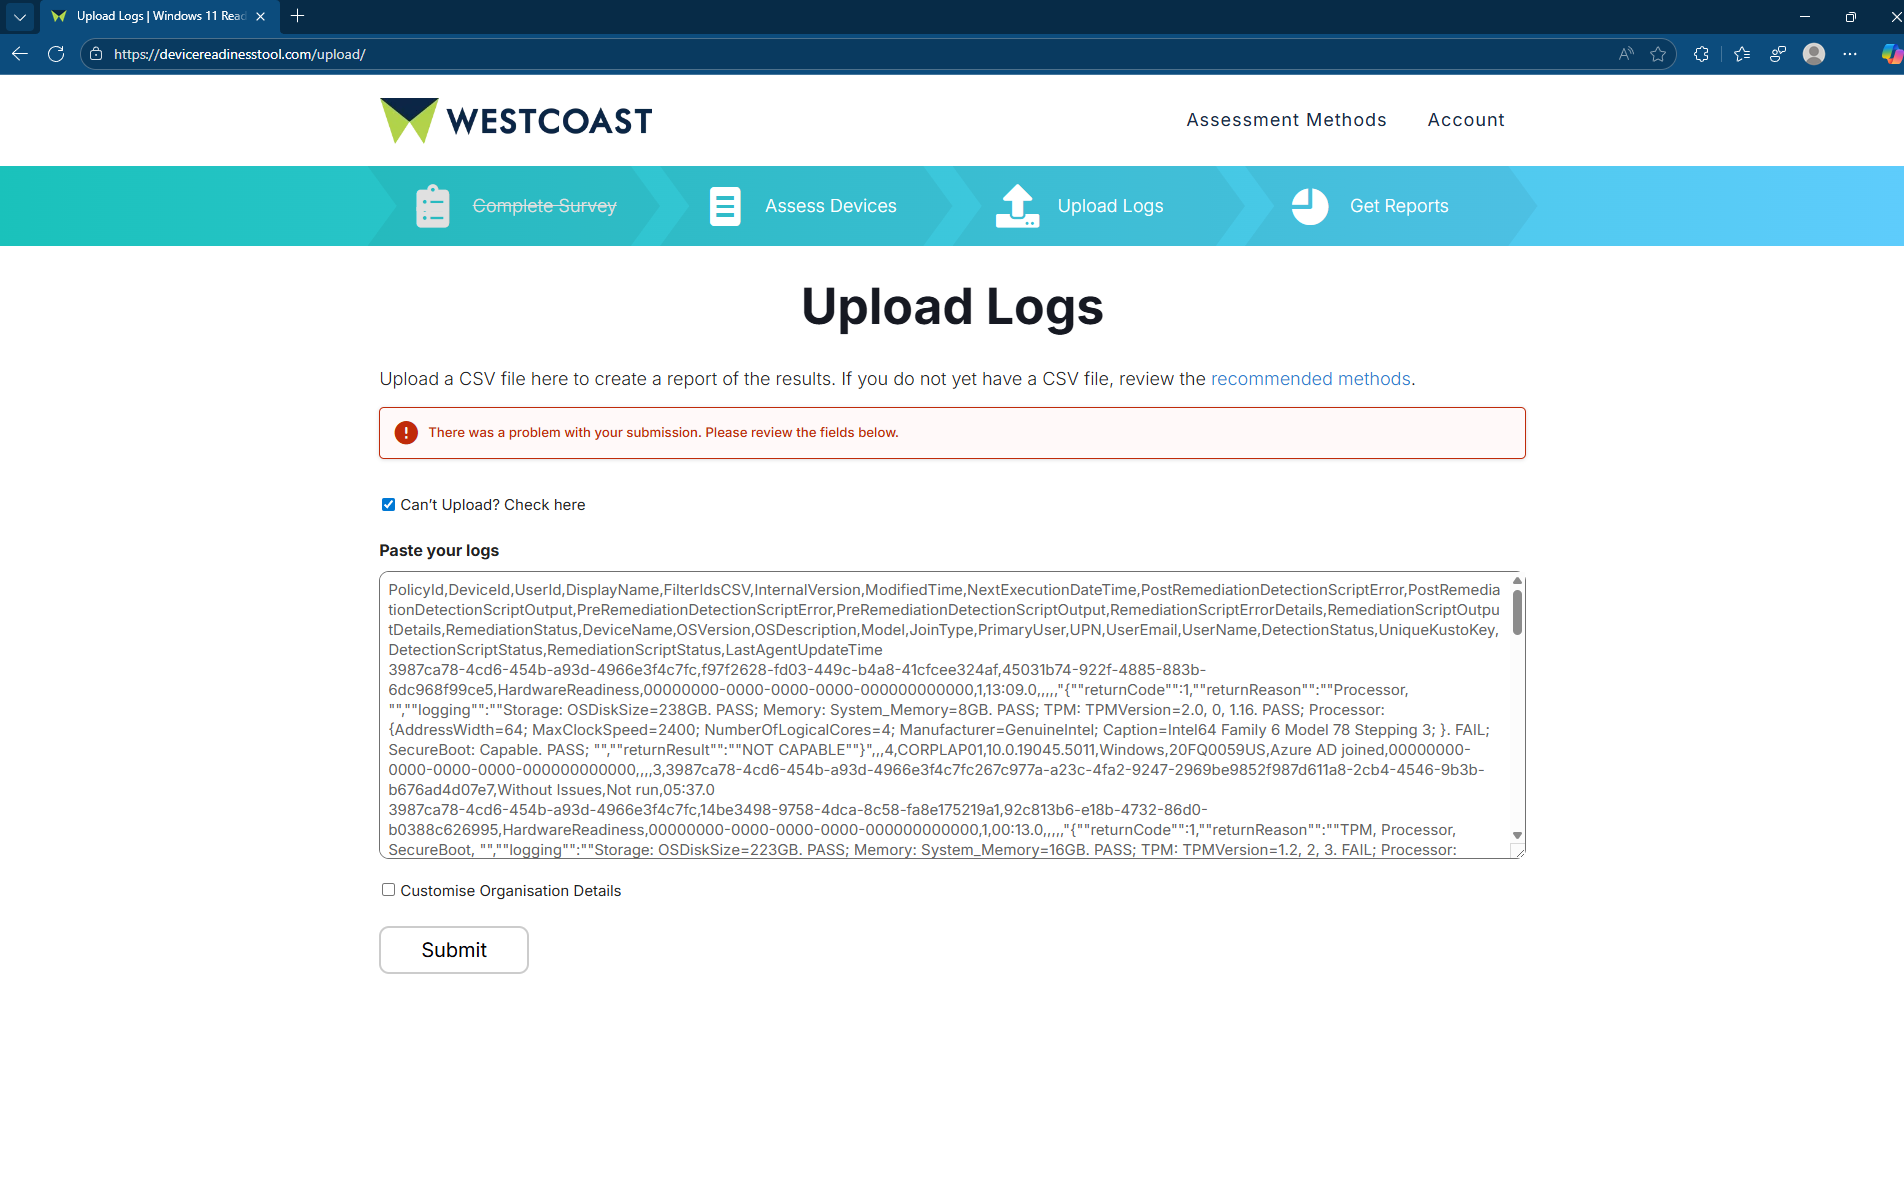 Click to enlarge
 -
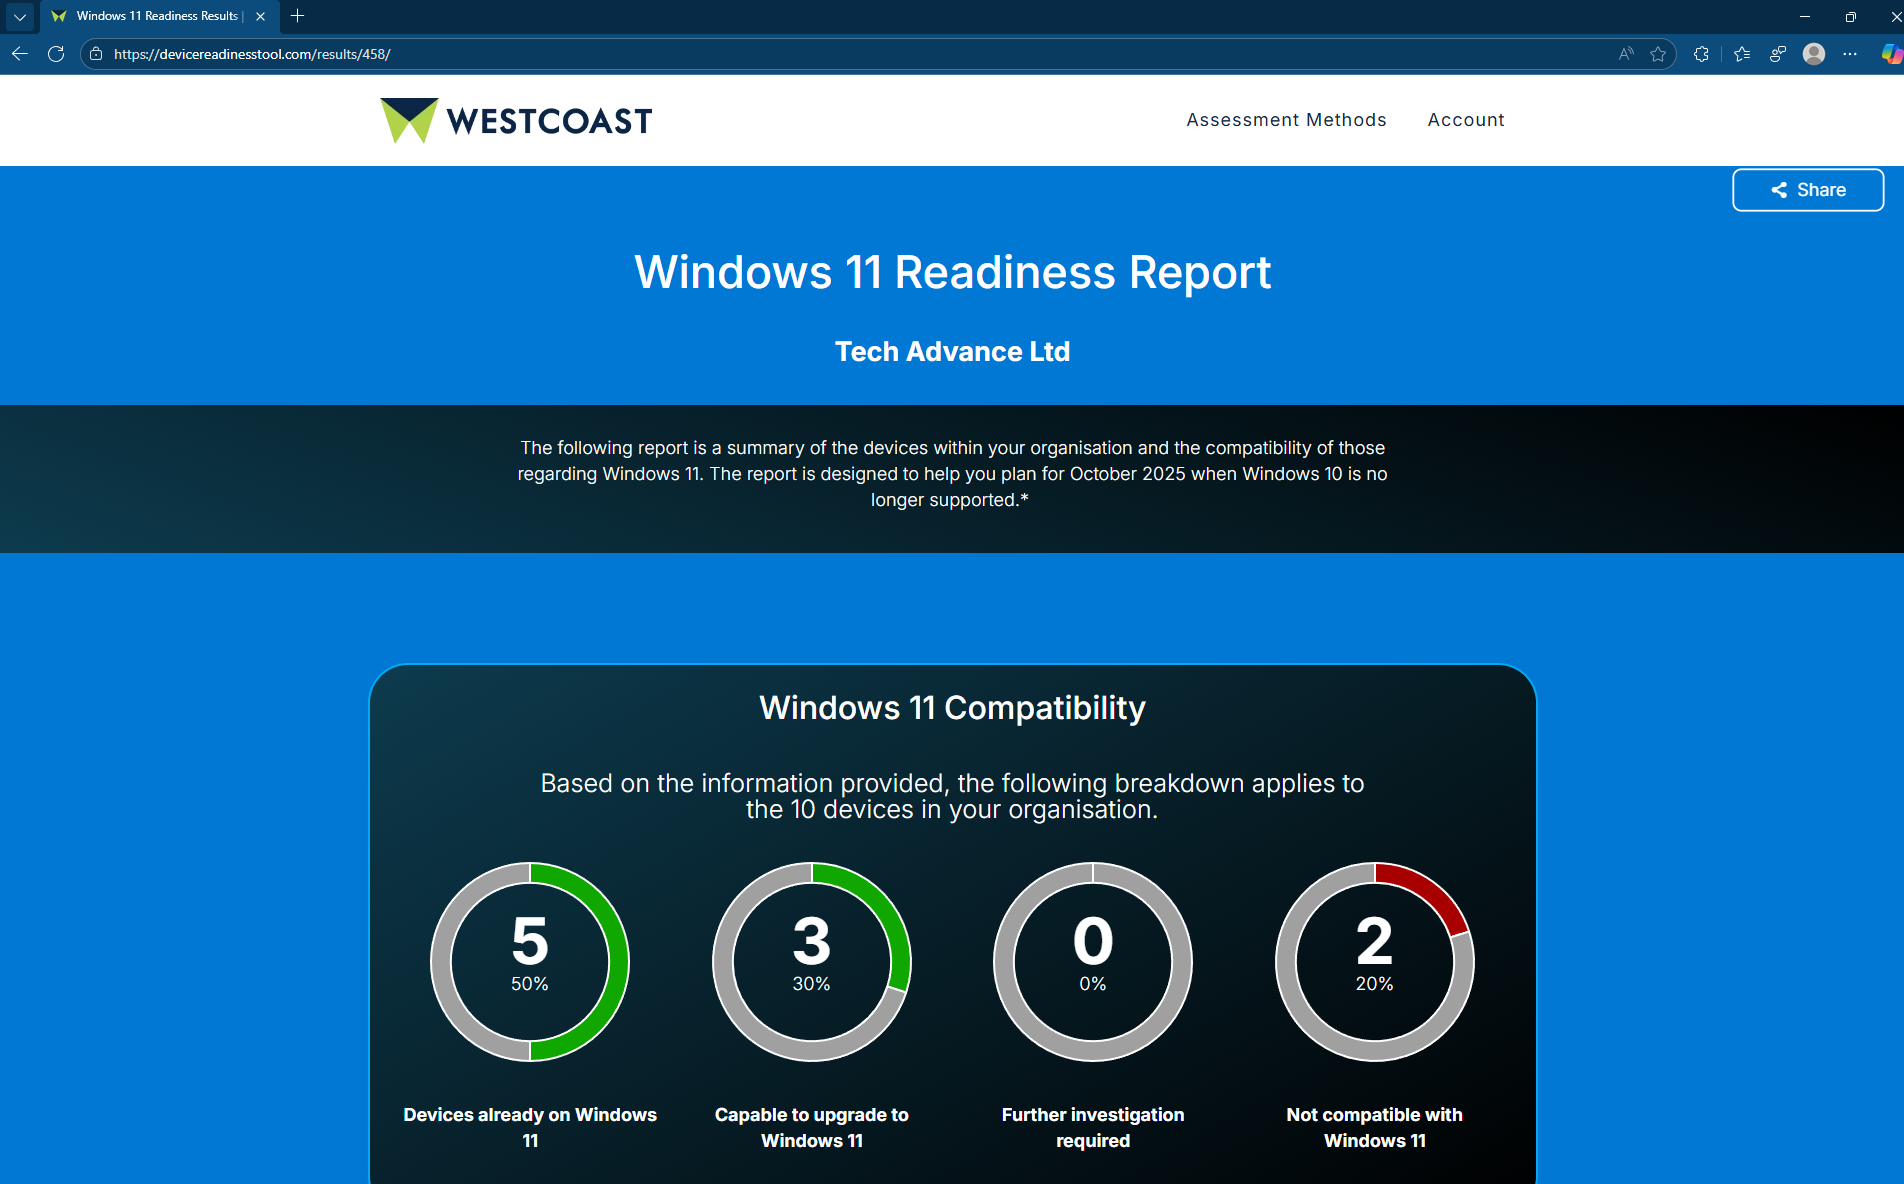
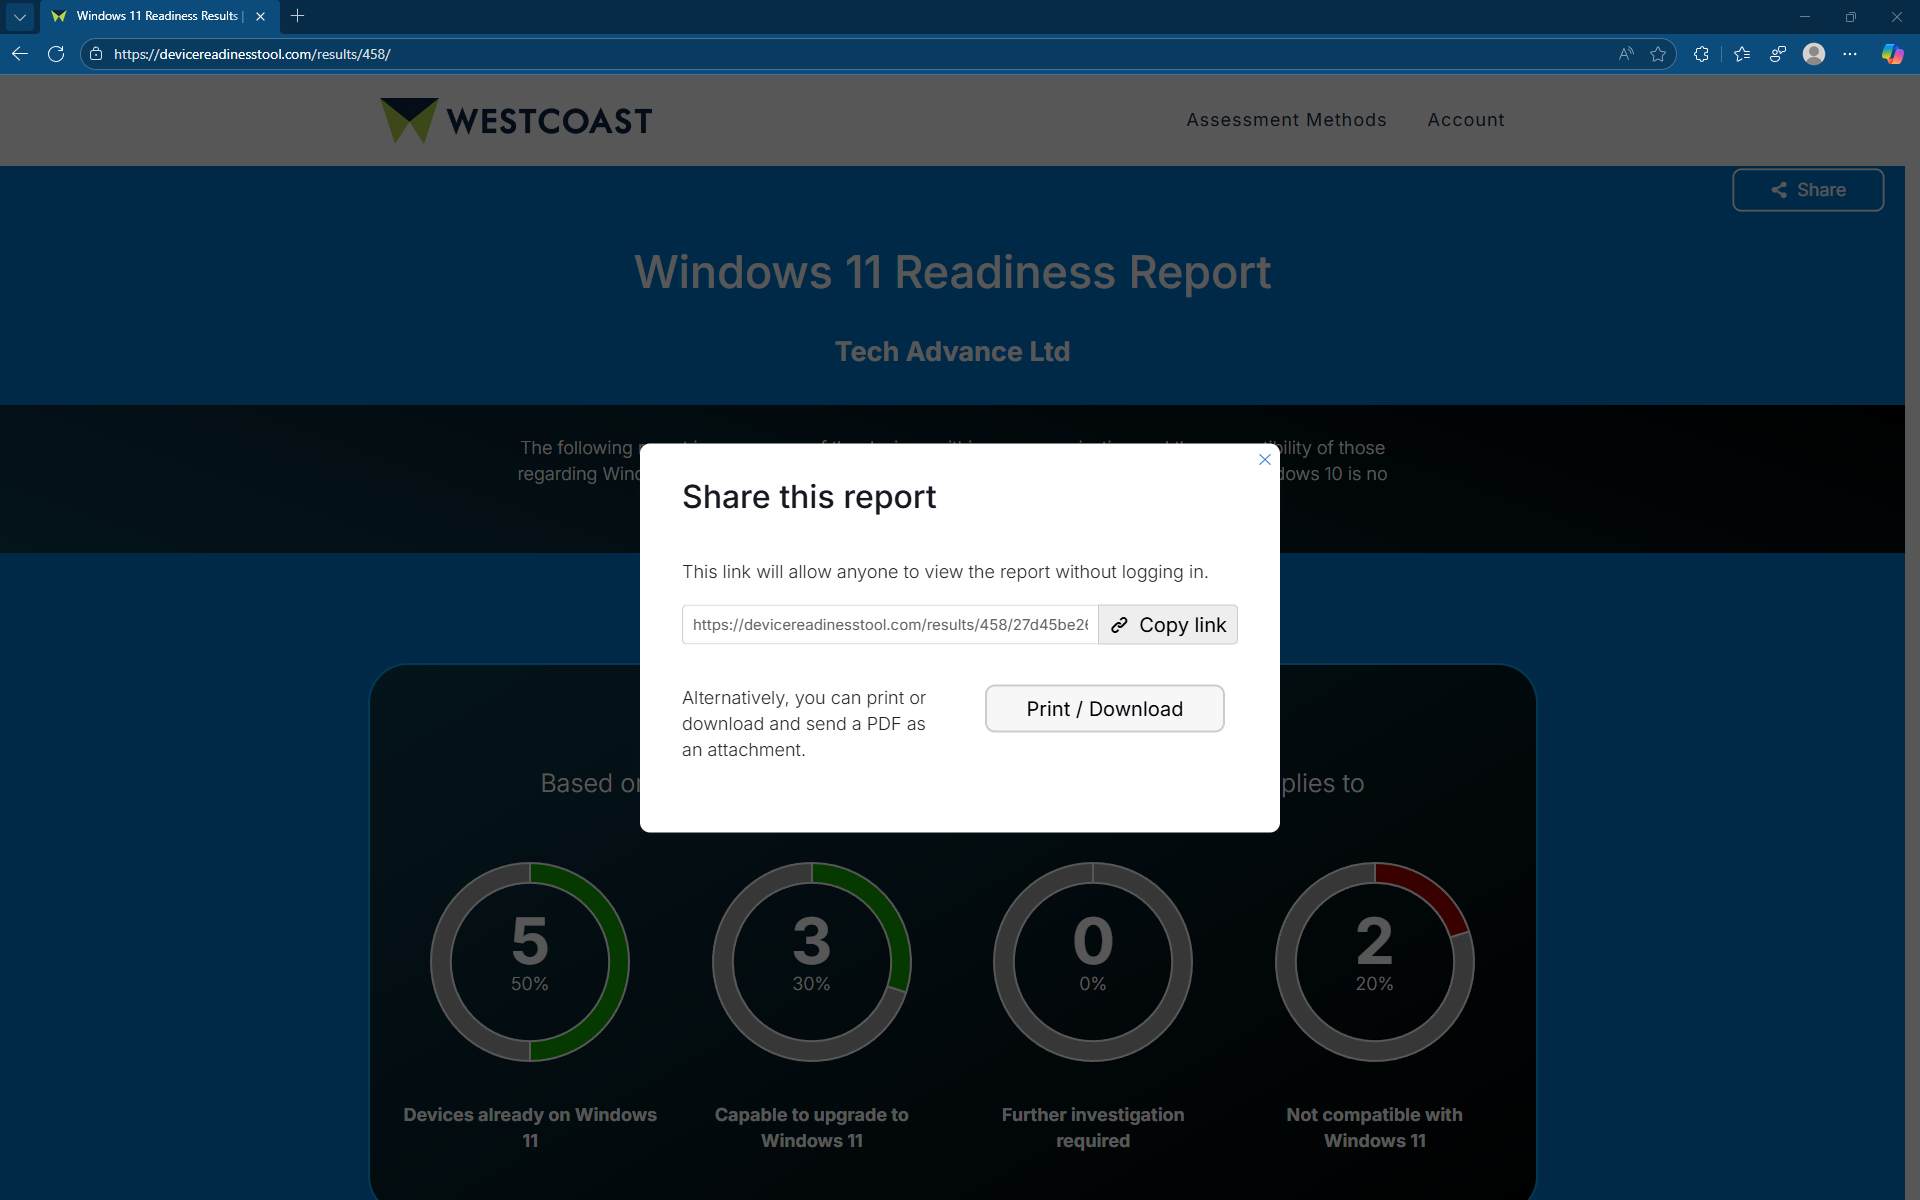
Once processed, the Windows 11 Readiness Report will be displayed.
 Click to enlarge
 -
You may choose Share to generate a unique report link, or export as a PDF.
 Click to enlarge
 -
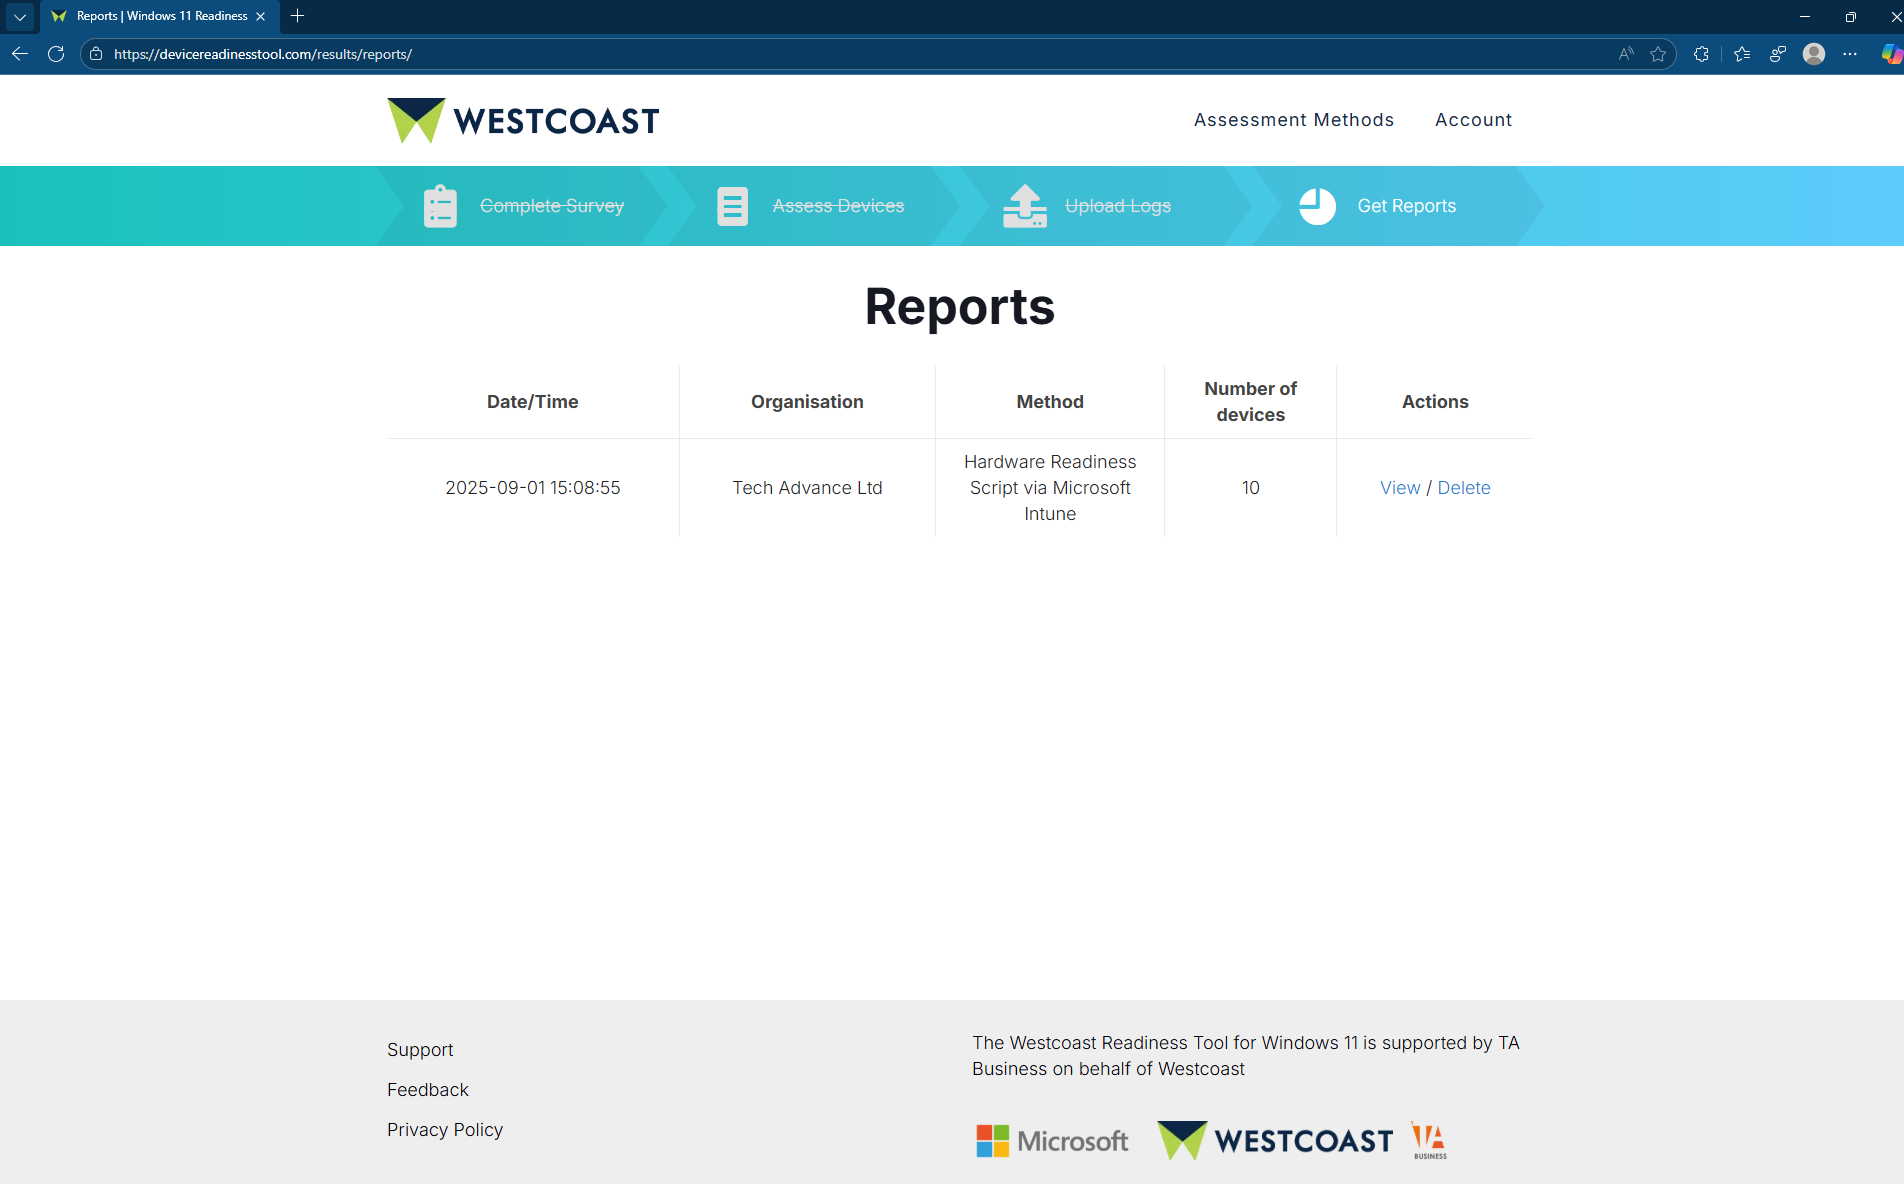
To revisit past reports, log in and choose Get Reports to view available reports.
 Click to enlarge
×
![Expanded view]()